
If your Android phone used to make it through the day and now needs a charge by early afternoon, the cause is very often sitting in a settings menu rather than a failing battery. Screen habits, background app activity, and a handful of connectivity features quietly add up, and most of them can be adjusted in a couple of minutes once you know where to look.
This guide covers 12 settings worth checking, in a sensible order to work through them. Not every setting will apply to every phone — some features are specific to Samsung, Pixel, or other manufacturers — so we’ve noted where that’s the case. Work through these gradually and give your phone a day or two after each change to see if it makes a real difference, since battery use naturally varies day to day depending on how you’re using the phone.
1. Check Which Apps Are Actually Using Your Battery
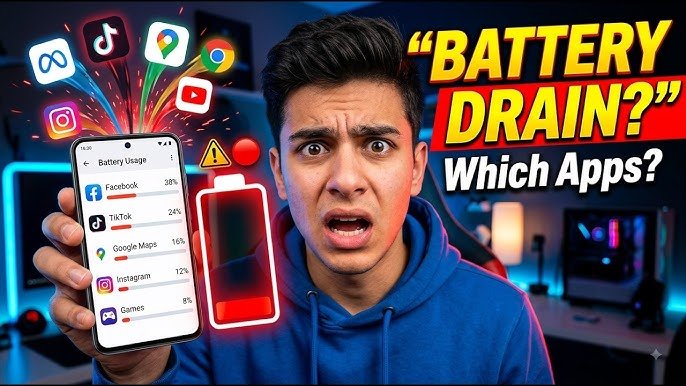
Before changing anything, look at what’s actually draining power. Go to Settings → Battery (on Samsung, this is Battery and device care → Battery) to see a breakdown of battery use by app.
This step matters because it tells you whether the drain is coming from something you actively use — like navigation or video streaming — or from an app you barely open. If an app you rarely use is consuming a disproportionate share of battery, that’s a strong signal something about that specific app is behaving abnormally, and it’s worth investigating on its own rather than assuming it will be solved by general settings changes.
2. Turn On Adaptive Battery
Adaptive Battery is a built-in Android feature that learns which apps you use often and which you don’t, then <cite index=”46-1″>restricts how apps you rarely use are allowed to run in the background</cite>. It doesn’t affect the apps you use regularly — <cite index=”52-1″>apps you use less often simply run less while you’re not using them</cite>.
To enable it, go to Settings → Battery → Adaptive Battery (path may be under Battery → More battery settings on some phones, or Battery and device care → Battery → More battery settings on Samsung devices).
Important to know: Adaptive Battery needs time to work well. <cite index=”52-1″>After setting up a new device or a factory reset, it can take a few weeks for optimization to take full effect</cite>, and <cite index=”63-1″>a major software update can reset some of what it’s learned</cite>, meaning battery life may temporarily feel less optimized right after a big Android update. That’s expected behavior, not a sign something’s broken.
3. Lower Screen Brightness or Enable Adaptive Brightness
The display is consistently one of the largest sources of battery drain on any smartphone. Manually keeping brightness high, especially outdoors, uses noticeably more power than letting the phone adjust automatically.
Go to Settings → Display → Brightness, and turn on Adaptive Brightness (sometimes labeled Automatic Brightness) so the phone adjusts based on ambient light rather than staying at a fixed level. If you find Adaptive Brightness pushes the screen brighter than you’d like in certain situations, it can be turned off again in favor of manual control — the automatic version isn’t mandatory, just usually more efficient.
4. Reduce Screen Timeout
A longer screen timeout means the display stays lit for longer after you stop using it, which adds up over dozens of daily unlocks. Shortening it is a small change with a real cumulative effect.
Go to Settings → Display → Screen timeout and choose a shorter duration, such as 30 seconds or one minute, instead of two or five.
5. Switch to a Lower or Adaptive Refresh Rate
Many current Android phones default to a 90Hz or 120Hz display refresh rate for smoother scrolling and animations, but higher refresh rates draw more power than the standard 60Hz. If your phone offers an adaptive refresh option, that’s generally the better middle ground: <cite index=”51-1″>it allows the phone to scale down to lower rates when the screen is mostly static and increase again when smoother motion is actually needed</cite>.
Check Settings → Display → Motion smoothness (Samsung) or Settings → Display → Screen refresh rate (varies by manufacturer) and switch to Adaptive if available, or manually select 60Hz if you’d rather prioritize battery life over visual smoothness. Some phones, including certain Realme, OnePlus, and Samsung models, also let you set refresh rate limits on a per-app basis for more granular control.
6. Use Dark Mode on OLED Screens
If your phone has an OLED or AMOLED display — which covers most current Samsung, Google Pixel, and higher-end phones from other manufacturers — switching to dark mode can meaningfully reduce power use. That’s because <cite index=”49-1″>OLED screens turn off individual pixels to display black, so a darker interface uses less power than a bright white one</cite>, unlike LCD screens where brightness draw stays roughly constant regardless of color.
Enable it under Settings → Display → Dark theme (or Dark mode). If your phone uses an LCD panel instead of OLED, dark mode is still fine to use, but it won’t provide the same battery benefit — it’s a cosmetic preference rather than a power-saving one on that display type.
7. Review Background Usage Limits for Specific Apps
Beyond Adaptive Battery’s automatic learning, most Android phones let you manually restrict background activity for individual apps. This is especially useful for an app you’ve identified through the battery usage screen as a heavy background consumer.
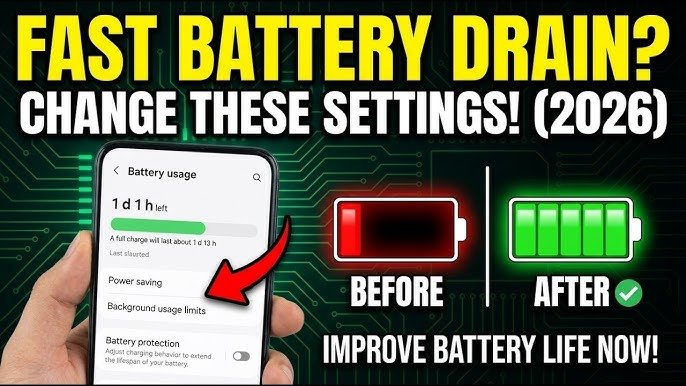
Go to Settings → Apps → select the app → Battery, and look for background usage options — typically labeled Unrestricted, Optimized, or Restricted. Setting a problem app to Restricted stops it from running in the background almost entirely.
A caution here: restricting background activity for messaging, email, or banking apps can delay notifications you actually want to receive in real time. Apply strict limits selectively to apps where a delay in background activity won’t matter — games, shopping apps, or anything you only open occasionally — rather than across the board.
8. Turn Off Wi-Fi, Bluetooth, and Location When Not Needed
Radios and sensors that are actively scanning or connected all draw power continuously, even in the background. <cite index=”50-1″>Keeping Wi-Fi, Bluetooth, and mobile data enabled when you’re not using them consumes battery, and apps that use location services constantly track your position</cite>, which adds up over the course of a day.
Turning these off manually when you don’t need them helps, though most people find it easier to rely on their phone’s Battery Saver mode (covered next) or app-level location permission settings (Settings → Location → App location permissions) rather than toggling connections on and off throughout the day.
9. Check for a Weak or Unstable Signal
A phone constantly searching for signal — whether cellular or Wi-Fi — uses noticeably more battery than one with a stable connection. This is easy to overlook because it doesn’t show up as an obvious “app” draining power.
If you’re regularly in an area with poor reception, switching from 5G to 4G/LTE in your network settings can reduce the battery cost of the phone repeatedly trying to maintain a stronger connection it can’t get. In areas with no signal at all, such as flights or remote areas, enabling Airplane Mode prevents the phone from continuously searching for a network it can’t find.
10. Enable Battery Saver Mode When You Need It
Battery Saver (sometimes called Power Saving Mode) reduces background activity, may lower performance slightly, and can limit certain visual effects to stretch remaining battery life. Most phones also offer a more aggressive “Extreme” or “Ultra” power saving mode for situations where charging isn’t available for an extended period.
Turn it on via Settings → Battery → Battery Saver, or set it to activate automatically at a battery percentage you choose, such as 20%. This isn’t something you need to leave on permanently — it’s most useful as a situational tool for travel days or when you know you won’t be near a charger.
11. Clear Cache for Google Play Services (If Drain Started After an Update)
If unusual battery drain began right after a system or app update, a bloated or corrupted system cache can occasionally be the cause, particularly with Google Play Services, which runs continuously in the background on most Android phones.
Go to Settings → Apps → Google Play Services → Storage → Clear cache. This does not remove any app data or account information — only temporary cache files. If drain problems began immediately after installing a specific new app rather than a system update, uninstalling that app and monitoring battery life afterward is a more direct way to test whether it’s the cause.
12. Restart Your Phone Periodically
This is simple, but it matters more than people expect. A restart clears background processes and temporary states that build up over days of continuous use, and it can be a useful test on its own: if unusual drain improves noticeably right after a restart, that points toward a background process or app issue rather than a battery health problem.
Restarting roughly once a week is a reasonable habit. If your phone supports scheduled automatic restarts (available on several manufacturer skins, including One UI), that removes the need to remember to do it manually.
When It’s Not a Settings Problem
It’s worth being honest about the limits of settings changes. If your phone is more than two or three years old and battery life has been gradually getting worse over many months rather than dropping suddenly, the cause may simply be normal battery aging — lithium-ion batteries lose some capacity over hundreds of charge cycles, and no setting reverses that. Most phones let you check estimated battery health under Settings → Battery → Battery health or through your manufacturer’s diagnostics app, where available.
If drain is sudden, severe, and paired with the phone feeling unusually hot even when idle, that’s also worth taking seriously as a potential hardware or app-specific issue rather than something a settings adjustment alone will fix — in that case, testing in Safe Mode to see whether the drain continues without third-party apps running can help you determine whether it’s software or hardware related.
A Note on Battery Saver and Booster Apps
It’s worth mentioning directly: installing a third-party battery-saving or booster app is generally not necessary and can sometimes work against you. <cite index=”44-1″>Avoiding random booster apps and not installing extra battery saver apps</cite> on top of Android’s built-in tools is a reasonable approach, since these apps often run their own background processes to do their job, which can offset whatever battery they claim to save. Android’s built-in Adaptive Battery and Battery Saver features are generally sufficient for most people.
Frequently Asked Questions
Is it normal for my battery to drain faster right after a software update? Yes, to some extent. <cite index=”56-1″>After a software update, some extra battery drain is normal because the phone is working to download, install, and optimize the new software</cite>. If drain hasn’t returned to normal after several days, it’s worth checking the settings above rather than assuming it will resolve on its own.
Does closing apps in the recent apps screen actually save battery? It can help in some cases, particularly for apps that are actively running background processes, but Android is generally efficient at managing this automatically through Adaptive Battery. Manually force-closing every app throughout the day is usually unnecessary and, on some phones, can slightly increase battery use since the app has to fully reload from scratch next time you open it.
How long does Adaptive Battery take to work properly? It varies, but expect it to take from several days up to a few weeks of normal use for the feature to learn your habits accurately, especially after a factory reset, new device setup, or major software update.
Should I turn off background app refresh entirely? Not entirely, unless you’re comfortable with delayed notifications from every app. It’s more effective to identify specific high-drain apps through the Battery usage screen and restrict those individually, while leaving apps like messaging and email on their normal or optimized settings.
Will using dark mode help my battery if I have an LCD screen instead of OLED? Not meaningfully. Dark mode’s battery benefit comes specifically from how OLED and AMOLED screens handle black pixels. On an LCD, brightness draw stays roughly the same regardless of what color is on screen, so dark mode is more of a visual preference in that case.
When should I be concerned this is a battery health issue rather than a settings issue? If drain has worsened gradually over many months on an older phone, or if your phone’s battery health diagnostics (where available) show reduced capacity, that points toward normal battery aging rather than something fixable through settings.